At TruScribe, we live on the whiteboard. Our team knows how to take a client’s message and transform it with hand-drawn visuals and voiced narration, and we work every day to improve our craft and continue to please our clients. From the outside, though, whiteboard might seem a little different than the usual approach to communications.
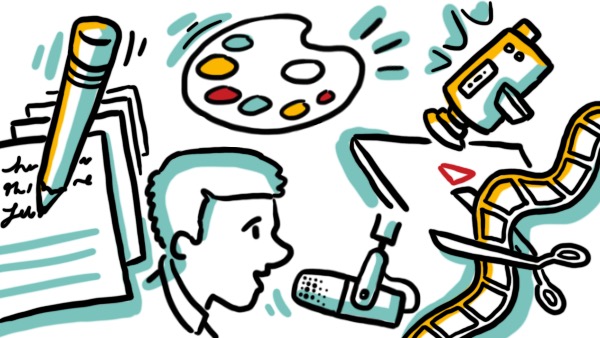
So let’s get everyone on the same board (sorry, I couldn’t help it) with a rundown of what components go into a whiteboard video.
Scriptwriting: Finding the Right Words for Your Message
“Coming up with ideas is the easiest thing on earth. Putting them down is the hardest.”
—Rod Serling.
The first element of the whiteboard video that we work on is the script. Without the script, there are no drawings to plan (we call it “concepting”) and no video to shoot—and that’s because there’s no message. Whiteboard video works to amplify and augment a message, and so scriptwriting comes first.
As you write your whiteboard script, begin with an understanding of the video’s length (and, potentially, word count). With this constraint in mind, decide on your main point. This could be your new training program, your product, or a policy change; your most important point is whatever you want your audience to leave thinking about.
Now, think about any other points you may have. Try to keep the number low. No matter how long your final video will be, you’ll want to give ample time to each of your points. In particular, emphasize your main point. The other reason to focus on only one or two points involves clarity. Tackle too many issues and your audience might not be clear on which point was most important to you.
As you write, start to think about the role of the artist in the whiteboard video. Don’t try to anticipate what they’re going to draw, necessarily; whiteboard artists are extremely skilled at concepting art for any topic, so they won’t need assistance.
Don’t lean heavily on metaphor or phrasing that will hinder the artist’s abilities. Metaphors can be difficult to successfully maintain throughout a video. And highly-specific language can force the artist into a single direction.
Drawings: Creating Images that Support Your Message
“Inference is dramatically inferior to being shown—especially when it comes to building resonance in the audience.”
—Dan Olson
Once your script is complete, the next component is drawings. With your script in mind, whiteboard artists will concept drawings to complement your script’s message. These drawings will sync with your script as your narrator reads it (more on audio soon). They will line up not only with the broad message of your script but with the specific sentences being read.
Since whiteboard drawings are meant to support and enhance the message of the script, they’re designed with viewer engagement and retention in mind. Artists create simple drawings that are easily recognizable and memorable.
When the brain is given a choice between visual and audio information, it will choose to process the visual information. Distracting drawings will cause your audience to ignore all of the audio information that they’re meant to support.
Whiteboard drawings also include an accent color. That is used to drive attention to the most important parts of the frame. At TruScribe, we strongly encourage the use a single accent color instead of a multicolor approach.
With multiple colors, your audience won’t know what each one signifies, or which one is meant to be the most important. Worse, too many colors might create a frame so stimulating that the brain chooses to look at the colors and ignore the message. This is a similar problem to the one that arises with overly complex drawings.
Sounds Like a Great Idea: The Voice for Your Message
“Speech is a very important aspect of being human. A whisper doesn’t cut it.”
—James Earl Jones
The script and the drawings are here to best promote your message. So the next step is to make sure your message is (literally) well-heard. What kind of voice would make the best narrator for your video?
Think about some criteria. Do you have an age range in mind? Gender? How about vocal range—would a high, low, or mid-ranged voice suit your script? Is there an accent that would help to localize your message? And then there’s delivery: are you looking for a bubbly, fast-paced read, or a more serious, measured delivery?
Once you’ve chosen your voice actor and recorded your narration, you’ve essentially got all the pieces of a whiteboard video—script, visuals, and voice.
Now, it’s time to film and edit.
Putting it All Together: Filming and Editing
“Editing is not a technical process. It’s an artistic process. It’s about storytelling. What editors do is the final rewrite of the script.”
—Jack Tucker
Making a video out of your drawings and voiced script involves a process of filming, followed by editing. The whiteboard artist will film themselves drawing your visuals, live and in the order that they’ll appear in the final video. Next, an editor will work to synchronize the audio and visual and address any issues of timing and color.
Sync is paramount since the power of the visuals to enhance your message will only be possible if the visuals appear in tandem with the voiceover. Bad synchronization can create the same problem that multicolored or complicated visuals do: distract, and ruin your viewer’s ability to retain your message.
From script to drawings, audio, filming, and editing, the components of your whiteboard video all serve the same purpose: to enhance your audience’s engagement with your message and increase their retention of your information after they’ve watched your video.